Friday, January 9, 2015

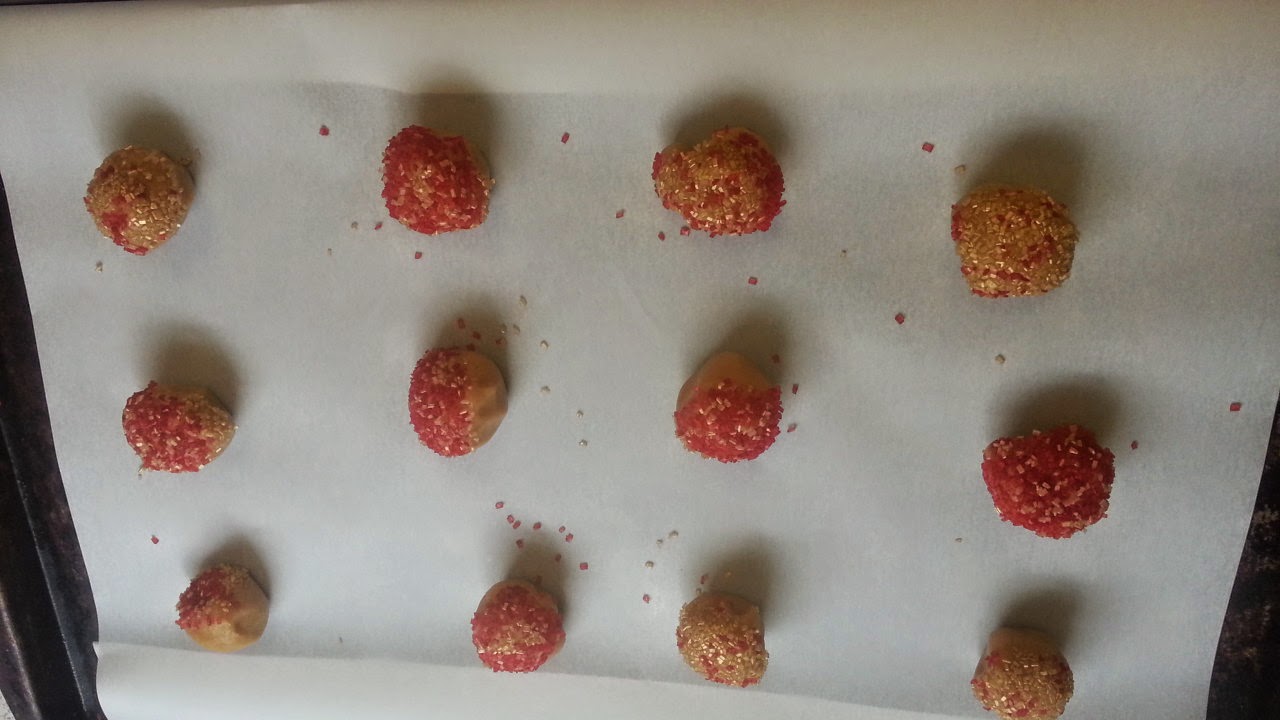
Peanut Butter Blossoms!

Yum! Yum! Yum! #MerryKissmas!

Red and gold sprinkles to get our blossoms in the holiday spirit!

Fresh from the bag!

My helper.  She helped roll the dough in sprinkles and then helped herself to some kisses.

Peanut Butter Blossoms are best when eaten fresh from the oven.

Hershey Kisses remains. 

I received these products complimentary from Influenster for testing purposes.

Thursday, October 16, 2014

Science Time! Muscles & Bones

Last week the kids were excited to get started on some science. We're following the Science - Biology Level L plan from Easy Peasy and after learning about biotic vs. abiotic the program move on to a simple human anatomy overview. The first lesson is about skin. The kids weren't too enthralled with it but I decided to supplement it with an episode of The Magic School Bus - Goes Cellular. Afterwards we dug the butcher paper out and started on our skeleton silhouettes so we could begin the big project!

My kids or creepy aliens?
A long weekend put our biology plans on hold and yesterday the kids were ready to start drawing! Our first lesson was all about muscles. Easy Peasy has a simple lesson plan laid out. The kids enjoyed the video about muscles especially the gluteus maximus joke. We later watched Sid The Science Kid - Muscle Boy Sid. Normally the kids don't care for Sid but they LOVED it yesterday! I think knowing a little about muscles made it more interesting for them. They enjoyed being able to explain to daddy about how muscles work. We then added biceps and quadriceps to our drawings:

Someone wanted purple muscles.
Today was focused on bones and how they protect our organs. I decided to hook up the laptop to the television so they could watch another Easy Peasy recommended video. The kids weren't too impressed. I did a search on Youtube and came across a great video about the skeletal system from MakeMeGenius.com. The graphics aren't the greatest but the video was short and the key points were reinforced thanks to a bright green parrot. We also watched a cute version of "Dem Bones" featuring skeletons on a felt board. Then it was time to add the radius and ulna along with the tibia and the fibula. Then it was time for lunch and an episode of The Magic School Bus - Flexes It's Muscles!


My sad attempt at drawing bones.

Wednesday, October 15, 2014

Learning As We Go!

In case I forgot to mention it, this is our first time homeschooling. I had planned on following the Easy Peasy schedule since it is totally free but for some reason it didn't seem like enough. I'm currently waiting on some books and programs I ordered for Language Arts to arrive. I should have most of them today and I will do a separate post on those later.

Today we focused on math - specifically The Number Line. C is pretty sharp when it comes to math. We are using the Light Blue Grade 1 from Math Mammoth and so far I am happy with it. He flew through the kindergarten review and the beginning Level 1 topics: Two Groups and a Total, Learning "+" and "-", Addition, Which is More?, Missing Items, and Sums with 5 and 6. Some of it he learned in kindergarten last year. We came to The Number Line yesterday and he was familiar with it While he isn't having trouble with the addition equations that accompany a number line, for some reason he gets confused when having to demonstrate the equation on the number line. For example:

If he is given the equation 2+4 he knows the answer is 6 but when he goes to show the equation using a number line, he will do odd things like count one tick mark as two numbers or he'll show the first part of the equation fine (2) but then he adds 6 more jumps rather than the 4 if that makes any sense. I tried making a small chart and using playing cards to make it seem more like a game.


It didn't go over too well so we stopped there. Today I tried using our Mala easel from Ikea. I originally bought this for the kids to play with but I'm discovering it's one of my favorite "classroom" tools! Anyways! I tried using this today and C continued to make the same mistake of inserting the answer into the addition equation. So I tried using just a blank number line with only 0 and 10 labeled. It ended up working! While he didn't do 100% he improved greatly. Maybe all those numbers just get in the way. I did notice that if he just focused on the answer instead of doing separate jumps for each part of the equation he did better.


Of course P was enthralled by this number line and wanted a turn too. She just turned 5 so I'm letting her take the lead as far as what "grade level" we work at. The other day we worked on adding using our hands and she just didn't like it too much so it didn't go far. She was adamant about having a turn with the number line. I started off with a shorter number line of 0-5 and kept it simple and she did very well!
I even tried to trick her by using a 0 but there is no fooling her!

Monday, October 13, 2014

Liberty's Kids - The Complete Series FIVE DOLLARS on Amazon!

Amazon deals come and go with no warning. I'm not sure how long this will be on sale for so be sure to grab it quickly! (affliate link)

Liberty's Kids - The Complete Series

Tuesday, October 7, 2014

Our Homeschool Journey Begins!

We are officially a homeschooling family!  It took a few phone calls and resending an email of my Letter of Intent to the Home Education office at the BOE, but we did it. 

K will be using FLVS (Florida Virtual School) for his 9th grade core subjects and I'm hoping to supplement other courses using traditional homeschooling.  Keep your fingers crossed that I can figure this out.

C is a first grader.  I decided to fore-go a boxed curriculum and just put my own budget conscious curriculum together: 

- Math:  Math Mammoth Light Blue Grade 1

- History:  The Story of the World: History for the Classical Child: Volume 1: Ancient Times: From the Earliest Nomads

- Reading/Science:  Easy Peasy All-In-One Homeschool

I'm still tinkering around with everything.  One thing I noticed is that C's handwriting is awful especially considering that he's had two years of public schooling!  There is no consistency in the way he writes his letters and numbers which normally wouldn't be such a bad thing but it really slows him down and frustrates him.  He also has a very awkward way of holding his pencils.  I'm considering ordering Handwriting Without Tears and spend this year trying to help him improve his penmanship. For now we're just doing daily writing with focus on proper pencil holding techniques. 

Meanwhile I am doing some kinder work with P.  If we were still in Ohio, she would have been eligible for kindergarten since the cutoff was September 30.  Here in Florida she would be in VPK. 

I've also been researching some ideas to incorporate music and art into our curriculum.  Right now I'm still trying to find balance though.


K helping P while I worked with C.

Thursday, July 24, 2014

My First Influenster Box!

The past few months have been insane and I am now finally getting around to my first INFLUENSTER box!  If you have never heard of Influenster, it is a FREE online program that anyone can join.  As a member you give your opinions and experiences with various products that are delivered via VoxBoxes.  By completing tasks such as surveys, posting photos to social media, and writing online reviews, you earn badges.  The more badges you earn, the higher your chances of receiving a VoxBox.

I was invited to join my first ever campaign:  The TLC VoxBox.


Behold!  My TLC Vox Box!

The lovely purple box contained the following:

A Shell Fuel Rewards Network Card
A coupon for a free tub of Breyers Gelato Indulgences
A pocket sized sample of Puffs to Go tissues
A full size tube of Neosporin Neo to Go
A full sized bar of Ivory Soap
A full sized Avon Anew Reversalist Express Wrinkle Smoother

Hands down my favorite part of this box was the Breyers Gelato.  I rushed my happy self to Kroger, located the beautiful boxes, and then made my choice:  Tiramisu!  While I love ice cream I don't buy it too often because my awful freezer turns everything into a solid block of ice no matter how low I set the setting.  I was very excited to discover that the Breyers Gelato didn't turn rock hard!  So after one particularly crazy and stressful day, I pulled it out of the back of the freezer (I hid it under bags of frozen veggies!), turned on Hulu, and de-stressed.

Don't forget!  Sailormoon is now streaming on Hulu Plus!


I don't know where a Shell station is nearby but we will be relocating back to Florida soon.  I will keep the rewards card handy since there are no Kroger Fuel stations in Southern Florida. 

The Puffs to Go were extremely helpful to have.  We live in the Miami Valley up here in Ohio.  It's one of the Top 10 Allergy Capitals of the United States.  I swear my husband needs to be in a bubble.  Thankfully I had the handy package in my purse one day while we were out running errands. 

My favorite part of the Neosporin Neo to Go is that it is a pain relief spray.  My kids get the worst boo-boos and the numbing ability of the spray is Heaven sent!

I had planned on using the bar of Ivory soap in the tub but we blew it up in the microwave instead.  My stupid camera on my phone didn't cooperate though.  All my photos came out super blurry.

I had huge hopes for the Avon Anew Reversalist Wrinkle Smoother.  I didn't really notice a difference when I applied it.  Maybe I don't use enough of it?  Maybe my wrinkles aren't "fine lines" as I imagine them to be?

Overall my first experience with Influenster was a good one.  I enjoy trying to earn badges by completing the various tasks for the TLC VoxBox.  Once I got the hang of the website, I started writing reviews and answering questions asked by other members.  Now I'm keeping my fingers crossed for my next VoxBox!  I hope it's soon! 


Thursday, June 5, 2014

Our Next Journey...

Ever since my older son was young, he has had stomach problems.  I remember when he was two years old and severely constipated.  He'd get awful rashes that would last for weeks that would make everything worse.  Doctor after doctor would prescribe something different for those rashes until the day one doctor took a look at it and said it was the result of a yeast infection.  I had to drag him to the base hospital and the doctors would squeeze him in to a giant plastic tube so they could x-ray his poor stomach.  He would have to be on laxatives or I'd have to use infant enemas to help move things along.  All of this before he was three.

For the next eleven years he would be plagued with problems.  Usually the doctors prescribe Miralax for a week and tell him he needs to eat more fruits and vegetables.  The problem?  He is without a doubt one of the pickiest (not to mention weirdest!) eaters ever.  I'd say 9 times out of 10 he puts whatever he's eating in some sort of bread product.  Well the past few years his poop manages to clog the toilets no matter where we live.  Florida toilets?  Clogged.  Georgia toilets?  Clogged.  Ohio toilets?  Clogged.  He has gas that can clear the room.  Heaven forbid you ever get stuck in a car with him.  Noxious I tell you.  Last YEAR I brought this to the attention of his PCM (Primary Care Manager) and she lectured him on eating better.  We tried Miralax.  After a few months she finally ordered an x-ray of his abdomen.  I got a call from the nurse - His entire colon was completely full.  She must have asked me at least half a dozen times if I was sure he wasn't in any pain because based on the x-ray he should have been in intense pain.  Plan of attack:  Three day Miralax cleanse.  Miralax 4 times a day before noon.  Lots of water.  Be sure not to go too far from home.  Stock on on toilet paper.  Be sure he has reading material in the bathroom.  Coordinate with school so he has unrestricted bathroom privileges because he would need to stay on the Miralax indefinitely.  If his problems have been around since he was two there is a chance his colon will take about ten years to shrink back to normal size.  Follow up x-ray in 6 weeks.

Six weeks later we report to the hospital for his follow up x-ray and appointment with his PCM.  Everyone is shocked that his colon is STILL full.  PCM is not sure what else to do so we are referred to the Gastroenterology department at Dayton Children's Hospital.  Luckily we don't have to wait long for an appointment.  So I grab him and his x-rays and we head for his appointment there.  They review it, they talk to him, they put him on a "colonoscopy cleanse" - 8 capfuls of Miralax with 64 ounces of Gatorade along with two doses of Dulcolax followed by daily doses of Miralax and sennasides until his follow up in six weeks.  They also ordered labwork to check for thyroid problems and Celiac disease.  We head on down to the lab, they take his blood, and we head home.

A few days later I get a call - the blood tests came back positive for Celiac.  They are referring him to the Pediatric Gastroenterologist for an EGD to obtain samples for a biopsy to confirm diagnosis.  According to WebMD: 

A small intestinal biopsy is performed with an esophagogastroduodenoscopy (EGD). During an EGD, the doctor inserts a long, flexible viewing endoscope through the mouth and into the duodenum (the first part of the small intestine, which is connected to the stomach). A long, flexible biopsy instrument then can be passed through a small channel in the endoscope to obtain samples of the intestinal lining of the duodenum. A pathologist evaluates the tissue samples for loss of villi and other characteristics of celiac disease, such as an increased number of lymphocytes.

Once again we are able to schedule the appointment quickly and we wind up back at Dayton Children's later the following week.  The day after his 14th birthday to be exact.  I didn't want him freaking out so I just told him that they needed to check his stomach because they suspect he might be sensitive to gluten.  The procedure goes fine and the doctor gives me photos and tells me that based on what he saw, he will be shocked if the biopsy does NOT confirm a Celiac diagnosis.

About 5 days later the phone call came and it was confirmed - Celiac Disease. 

We will be meeting with the doctor and a nutritionist later this week.  My mind is already spinning at what this means.  While going gluten-free is a huge undertaking, I am so hopeful at the thought that this might help with so many of his problems.  His moodiness, his ADHD, skin/nail problems, sleep issues, headaches, and so much more. 


Infographic courtesy of GlutenDude.com
I know it won't be an easy journey so I expect this blog and my postings to pick up dramatically as a way for me to not only cope but to also track our journey. 


Wednesday, June 4, 2014

MAMA FIERCE Launch!


And it's HERE!  We are ready to launch MAMA FIERCE!

My amazing friend and coach, Leah, has created this support group to help other mothers learn how to do the tough work when it comes to caring for themselves and their families. Together we will be tackling issues such as; nutrition, physical activity, stress relief, body image, self-love and whatever else may come up in our private Facebook group. This is all about YOU! This is a COMPASSIONATE and SAFE environment where we will encourage and love each other, never judging where another woman is at or the struggles she may face.

I am asked all the time how I get my kids to eat healthy, how I manage to eat healthy, how I find the time to exercise, how I keep a positive mindset, how I manage to keep my sanity when my husband is gone, how I handle my household while being a stay-at-home mom who is never home, and to be honest with you it's tough. I have my days where I feel like I'm just never going to get it together, it seems like I have no control over anything, and I wonder what the heck I’m doing wrong. What I have come to realize is that no matter how perfect someone else’s life may seem it never really is. Everybody struggles behind closed doors. Striving for perfection is going to get you NOWHERE. Taking care of yourself is an ongoing process.  It’s not something you do for a day or two and then life magically becomes full of sunshine and rainbows. I make mistakes too, sometimes big ones. Sometimes I let myself sit a little too long in a funk and life is never pretty then. Crazy things come up that are beyond my control, usually all at once (because that's how it works right?) My life is not a shining example of the "ultimate dream" and I'm not where I want to be. But I AM on my way and I WILL get there.

The past few years have been difficult but through it all I've learned a TON about what it takes to pull myself out of a bad funk and get myself in gear. I've learned how to make myself a priority.  I’m not going to lie – it was hard at first!  I was so used to putting everyone else before myself.  Then I learned to say “I deserve some time for me!” and in the end it always works out favorably not only for myself, but for my family as well.  Most importantly, I've learned how to be authentically me and let go of the fear of what others may think.  Okay maybe I'm still working on that one a little bit.  😂

Our Mama Fierce team has taken all of our experiences and combined them with tips for promoting a healthy body image and a good relationship with food in your children, and we’re offering it in a 30-day course. You also get a workout program, an organic super food shake equal to one meal a day, and the support of a community of other moms going through the same thing. Oh, and we’re giving away wicked awesome prizes! Think - summer toys, arts and crafts, kitchen/lunch gear (Lego and FROZEN to be specific!) healthy snacks, organic teas and coffee, aromatherapy bubble bath, etc.! We’re still adding to the stock so there may be more to come! 1st, 2nd, and 3rd place winners will get to choose their prizes from specific categories and points are awarded based on EFFORT, not weight loss.

There are REQUIREMENTS!

✅ About 1 hour per day/4 additional hours per week. Some of this is play time and "me" time and it is NON-NEGOTIABLE!
✅ Willingness to commit for the full 30 days
✅ Willingness to make yourself a priority, knowing that it's for the good of your family
✅ A desire to make positive changes to your family's health habits
✅ A library card

If ANY of these are going to be a problem, then this is not the right course for you. But, if it does sound like something you're interested in, send me a message. We're taking applications until the 15th ONLY.  Spots must be secured by then!  We start on the 23rd of June. And please, if you know a mother who needs a little love and care in her life, share this with her.

I've never met a mother who wasn't FIERCE. You are strong enough just as you are, but sometimes you need a helping hand to realize it. 💕 💕

Sunday, March 9, 2014

Natural Easter Eggs

Two years ago I started doing some research in to the Feingold Diet and was slowly becoming aware of what exactly was in our food.  Nowadays when I talk to people about clean eating I am always sure to tell them, “Watch out! As you start reading more and more about this, you might very well go crazy thinking that there is nothing safe to eat!”  I tell them that because I almost did go crazy when I first started really delving in to it all: Monsanto, GMO, carageenan, artificial flavors, colors, preservatives, and so-on and so-on.  I decided that there was no way I could let my children dye Easter eggs with commercially available, artificial egg dye.  After researching it, I wanted to dye our Easter eggs with all natural dyes.  I bought a red onion and filled the bag with all the leftover onion peels, I went through my cupboards and refrigerator looking to see what I could find since I didn’t want to spend a fortune.

I ended up using red onion skins, green tea, black tea, paprika, lemon zest, lime zest, spinach juice (ewww!), and the juice from some pickled beets.  I put the coloring ingredients in boiling water and I think I added at least one tablespoon of vinegar to each bowl.

Green tea resulted in a pretty yellow hue.
Surprisingly enough the pickled beet juice yielded a very pale pink.
Black tea led to a pale brown.
The eggs that were soaked in red onion peels turned a lovely burnt sienna.


Overall I awarded my homemade Easter egg experiment a success.  My younger kids were only 3 and 1 at the time so I think I was more excited then them over the results.  I didn’t get to repeat the experiment last year but I’m hoping to do it again this year with some different ingredients.

Saturday, December 7, 2013

One Year Ago: I’m a Daily Winner in the Beachbody Challenge!

I talk about Beachbody and Shakeology a lot. I know. I can’t help it. I’ve lost almost 40lbs, I’ve won free clothing from them, and now they’ve gone and given me FIVE HUNDRED DOLLARS for getting in shape. I’m now a Daily Winner thanks to my transformation story!

BOOYAH!! :D

A new year is coming up! Who is ready to get fit? Who wants to learn more about Beachbody? Message me with any questions. :)

Saturday, October 26, 2013

Animal Crossing Problems: Unwanted Villagers

Okay if you follow me on Instagram you know that I am an Animal Crossing junkie.  I L-O-V-E the game! I love my Pikachu 3DSXL.  I love collecting Street Passes.  I love getting new Street Pass homes.  I love collecting Friend Codes.  I love visiting other towns and I love having other players visit my town.  There is a downside to Street Pass and visitors though...

Sunday, October 6, 2013

Last year on Black Friday I purchased myself a cast iron Dutch oven.  Mine is a beautiful teal because I like colorful cookware. I had previously purchased a cheap, non-stick dutch oven from Kroger because I needed one for a recipe. Well I loved using it so I’ve been wanting to upgrade to a cast iron version plus I am always on the lookout for more recipes. Thanks to Google, I discovered Everyday Dutch Oven and it’s plethora of recipes!  Just the other day I was cleaning out my fridge and noticed I had a jar of pesto so I decided to try the Pesto Chicken Breast.  I love the smell of pesto. Even my picky son could not wait for dinner. I will have to say though that while the dish was tasty it also had to be one of the un-prettiest dishes I have ever made.  :)   So no pictures unfortunately.  I did have some leftovers which are pretty darn tasty in some scrambled eggs!

Pesto Chicken Breasts
4 chicken boneless, skinless chicken breasts
1 tub or jar of prepared pesto sauce (I use Artisian Fresh Pesto from Sam’s Club)
3-4 Tbsp grated Parmesan cheese
1 cup breadcrumbs
3-4 Tbsp melted butter
1. Lightly oil your dutch oven.
2. Place chicken breasts in bottom of dutch oven.
3. Spread chicken with pesto sauce and sprinkle with Parmesan cheese.
4. Melt butter and mix with bread crumbs.
5. Sprinkle buttered breadcrumbs over chicken and bake for 1 hour at 350 degrees.

Friday, October 4, 2013

Roasted Butternut Squash

Last time this year my husband returned home from a six month deployment.  He had missed out of my paleo experiment but I was able to introduce him to some of the recipes I discovered while he was gone.   Well one day I was at Dorothy Lane Market and they had butternut squash on sale.  I decided to pick one up even though I had no planned recipe in mind.   Well we all know that I fell in love with the Skirt Steak with Chive Butter I found from The Food Lovers Kitchen website.  I decided I was going to make that for the husband and I wanted a butternut squash side dish.  I found one in a catalog for spices that sounded easy to prepare.  I made it, we loved it, and here it is for all of you:

ROASTED BUTTERNUT SQUASH

Prep Time: 10 minutes
Cooking Time:  30 minutes
Serves 4
1 butternut squash, peeled and cut into 3/4 inch chunks
2 TBS olive oil
1/4 – 1/2 tsp salt, optional – to tast
1/4 – 1/2 tsp ground cinnamon
1/4 – 1/2 tsp ground nutmeg
1 TBS balsamic vinegar

Preheat oven to 400. Arrange the squash in a single layer in a baking dish. Drizzle with olive oil and stir to coat. Roast at 400 until soft and the edges begin to brown, usually about 30 minutes. Sprinkle with cinnamon and nutmeg for final 10 minutes of cooking. Remove from the oven and toss with salt and balsamic vinegar.

Nutritional Info:
Serving Size 3/4 cup (152g)
Calories 80
Calories from fat 60
Total fat 6g
Cholesterol 0mg
Sodium 125mg
Carbohydrate 5g
Dietary Fiber 2g
Sugars 4g
Protein 2g

Oh and before I forget!  One kitchen gadget that makes my life a little bit easier is the Misto Gourmet Olive Oil Sprayer. I used put anything that needed to be coated in olive oil in a bowl and dumped in more than the required amount of oil to coat it. With the Misto, I can spray ingredients like cubed butternut squash easily. I love it because I use less oil and I can fill the non-aerosol, BPA free can with high quality, organic olive oil.

Thursday, October 3, 2013

Skirt Steak with Chive Butter with Pear and Walnut Salad

This is another recipe flashback from my venture into paleo cooking.  I can’t say I was successful at being 100% paleo but I found a lot of recipes I really enjoyed.  People who NEED to eat paleo for medical reasons have my complete and utter respect because it is not easy!  I have found that a lot of my Go-To recipes are not doable.  My friend and I are trying to follow the 30 Day Intro to Paleo Meal Plan from The Food Lovers Kitchen.  It has not been easy for either of us but we are learning some incredible skills along the way along with some amazing recipes and techniques.

I have previously made the Skirt Steak with Chive Butter and quelle surprise!  3/4 of my picky kids ate it.  I loved it – so simple yet flavorful.  Unfortunately I have been unable to find skirt steak anywhere for over a week now!  I had to substitute Top Round which isn’t as good but it works. I guess.  I’m not a meat snob but I can tell I prefer skirt steak over top round.  Does that make me a meat snob?

Chive Butter Ingredients
  • 1 tsp Salt
  • 1 lb Skirt Steak
  • 1 Tbsp Chives, chopped
  • 3 Tbsp Butter, Unsalted, room temperature
Directions
  1. Preheat grill to high heat.
  2. Rinse skirt steak under cold water, and pat dry with a paper towel.
  3. Cut skirt steak into 3 pieces of equal length.
  4. Sprinkle each side generously with sea salt.
  5. Grill for 3 minutes per side.
  6. Remove from grill and allow to rest for 5 minutes.
  7. While steak is resting, whisk butter, 1/4 teaspoon salt, and chives with a fork.
  8. Slice steak against the grain.
  9. Top with chive butter and serve.
The first time I made this, I made the Pear and Walnut Salad to accompany it.  If you are interested in trying out the Paleo lifestyle, I totally recommend the 30 Day Intro e-book.
 
Pear & Walnut Salad Ingredients
  • 1/2 cup Dried Cherries
  • 2 Bosc Pear, very ripe
  • 3/4 cup Walnuts, Organic
  • 5 cup Spring Mix Salad Greens, mixed spring greens
Directions
  1. Cut pears into chunks, chop walnuts, and slice cherries in half.
  2. Toss with spring greens.
  3. Serve with Raspberry Balsamic Vinaigrette.
Raspberry Balsamic Vinaigrette Ingredients
  • 1 1/2 tsp Spicy Brown Mustard
  • 1/2 cup Extra Virgin Olive Oil
  • 3 Tbsp Raspberry Balsamic Vinegar
Directions
  1. Pour vinegar, Dijon mustard, and olive oil into a jar.
  2. Shake vigorously until all ingredients are evenly combined.
  3. Toss lightly with your choice of salad.

Wednesday, October 2, 2013

Beef and Bok Choy Stir Fry

This time last year I was trying to live more paleo to help support my friend who is hoping a paleo diet might alleviate the pain associated with her endometriosis.  This was a recipe I made. I found it at RealSimple.com and I really enjoyed it.  The flavors were delicious, it was very easy to make, and my kids enjoyed it.  I made it with a brown rice/wild rice mix instead of the long-grain white rice. 


Beef and Bok Choy Stir-Fry
Serves 4

Ingredients
  • 1  cup  long-grain white rice
  • 1  tablespoon  olive oil
  • 1  pound  flank steak, thinly sliced
  • kosher salt and black pepper
  • 4  heads baby bok choy, quartered
  • 1/4  cup  low-sodium soy sauce
  • 2  tablespoons  rice vinegar
  • 1  tablespoon  grated fresh ginger
  • 1  tablespoon  brown sugar
Directions
  1. Cook the rice according to the package directions.
  2. Meanwhile, heat the oil in a large skillet over high heat. Season the steak with ¼ teaspoon each salt and pepper.
  3. Cook the steak, turning often, until cooked through, 3 to 4 minutes. Transfer to a plate.
  4. Wipe out the skillet. Add the bok choy and ¼ cup water and simmer, covered, until tender, 2 to 3 minutes.
  5. Meanwhile, in a bowl, mix the soy sauce, vinegar, ginger, and sugar. Add to the bok choy in the skillet and bring to a boil.
  6. Add the steak and any accumulated juices and cook, tossing, until heated through, 1 to 2 minutes. Serve over the rice.

Sunday, September 29, 2013

Hooray! I’m a size 2! Unless it’s 2001. Then I’m a size 8.

Okay so I’m not sure if you’re aware of the fact that it’s been almost two years since I started my weight loss journey.  If you are, hooray!  You’re ahead of the curve!  If you aren’t, then check out my story here.  A while ago I undertook the arduous task of cleaning out my closet and my dresser drawers.  :D   Oh the agony of having to get rid of clothes that are too big.  Pretty much all of the slacks and jeans I bought before kiddo #3 no longer fit.  It kind of makes me sad because I had some awesome suits.  Gone are the men’s shirts too because I hated having to buy L and XL women’s shirts.  There is a downside to this story.  I was very eager to get back in to all of my Victoria’s Secret bras.  My lovely 34C bras.  After kiddo #4, I was a 38 C.  *sadness*  Yes I did NOT like big boobs.  What sucks is that I had just bought a bunch of 38C bras a few weeks before I started my Beachbody journey.  Nothing like throwing money away.  Anyways let’s get back to my 34C bras.  Well none of them fit either.  ULTIMATE SADNESS!!  I went and had myself fitted and I am back to my PRE-PREGNANCY 34B boobs.  Of course then I found out that Victoria’s Secret has discontinued their Body by Victoria line of bras.  CURSES!!

Back to cleaning out my closet and all.  Well I remembered that I had a tub of pre-kiddo #3 pants in the basement.  How pre-kiddo #3?  I bought most of these jeans back in 2001 when I was 24 years old and had just lost the baby weight from kiddo #2.  So I head downstairs, retrieve said tub, lug it upstairs, dust it off, and pull out some jeans that haven’t seen the light of day since 2006.  I start going through.  “Oh no!” I thought.  They were all size 8′s and size 9′s!  I couldn’t believe it.  I decided to try them on anyways.   Guess what?  They fit.  They fit perfectly.  This left me confused.  The size 8 jeans and slacks I bought 7 years ago are too big.  I mean WAY too big.  They fall right off of me.  The other week I tried on a size 3 in juniors and they fit and I just bought another pair of size 2 jeans last week.

Seems like the clothing industry really does mess with the way sizes run. So am I a size 2 or a size 8? I guess 10+ years ago I was an 8 and that translates in to a 2 this decade.  Does that mean I’ll be wearing a size 14 in the girls department someday?

Saturday, September 28, 2013

Sweet Potato Bread

During our first year here in Ohio, we experimented growing sweet potatoes. Actually what happened is I bought a sweet potato plant, stuck it in the garden, it overtook a large portion of said garden, and then we dug up a TON of sweet potatoes. That was 2011. Just last week I FINALLY used up the last of the sweet potato puree I made and froze back in 11/11 according to the bag.

This is just a small amount of our harvest.
I decided I wanted to make some sweet potato bread and muffins. I don't know why. I just wanted some homemade sweet bread goodness! Plus who doesn't want to make something that uses cinnamon, nutmeg, and brown sugar? As you can imagine my house smelled heavenly while these babies were baking.

So to christen my new blog I'm going to share the recipe I used. Please note that I skipped the first two steps because I already had my sweet potato puree.

Sweet Potato Bread
Makes 3 mini loaves or 24 muffins

¾ cup Butter, softened
2¼ cups Firmly packed Brown Sugar
1½ cups Sweet potato Puree
2 Eggs
2½ cups Flour
¾ tsp Salt
¾ tsp Ground Nutmeg
¾ tsp Ground Ginger
1½ tsp Baking soda
1 tbsp Ground Cinnamon
3/8 tsp ground cloves
½ cup Water

1. Scrub one large sweet potato, peel and cut into 2-inch long pieces, place in a small saucepan, and
cover with water. You can also use canned sweet potatoes.

2. Cook 25 minutes and puree in a food processor or mash with a potato masher.

3. Preheat oven to 375 degrees.

4. Butter and flour bread pan or line muffin tin with muffin papers.

5.With an electric mixer, cream the butter and sugar until light and fluffy; stir in sweet potato puree
and egg.

6. Sift together flour, salt, nutmeg, ginger, baking soda, cinnamon and cloves. Stir half of the dry
ingredients into creamed mixture; stir in water, then stir in remaining dry ingredients.

7. Bake until dry on top and a skewer inserted in center comes out clean. Muffins take around 25 minutes to bake, bread will take 45 minutes, depending on the oven and pan size.Serve warm

Then sit back and enjoy! All four of my kids LOVE these muffins and that is bigger than a two thumbs
up rating. ;)

Nothing better than a warm muffin and cup of hot coffee on a cool autumn morning!

Friday, September 27, 2013

Pan Roasted Chicken With Lemon Garlic Green Beans

Another dinner, another new recipe!  This time I decided to try Real Simple’s Pan Roasted Chicken with Lemon Garlic Green Beans. So far I have not been disappointed by the recipes I have found on the Real Simple website and their Month of Dinners menu plan is one of my favorite features. I was very pleased with the simplicity of this recipe and how it came out. I was nervous at first because the reviews were pretty divided. The chicken came out very moist, the veggies were nice and tender, and overall the dish was very flavorful. I loved the way the green beans turned out and would make them as a standalone side dish. I did have to make some modifications based on what I had on hand and the recipe is as follows:

Pan Roasted Chicken with Lemon Garlic Green Beans
Serves 4

Ingredients

6 tablespoons olive oil
1 lemon, juiced
1 large orange, thinly sliced
4 cloves garlic, chopped
1 teaspoon kosher salt
1/2 teaspoon freshly ground black pepper
3/4 pound trimmed green beans
8 small red potatoes, quartered
4 lbs bone-in, skin-on chicken pieces (I used 2 breasts and 4 legs)

Directions
1. Preheat oven to 450°F.
2. Coat a large baking dish or cast-iron skillet with 1 tablespoon of the olive oil. Arrange the orange slices in a single layer in the bottom of the dish or skillet.
3. In a large bowl, combine the remaining oil, lemon juice, garlic, salt, and pepper; add the green beans and toss to coat. Using a slotted spoon or tongs, remove the green beans and arrange them on top of the orange slices.
4. Add the potatoes to the same olive-oil mixture and toss to coat. Using a slotted spoon or tongs, arrange the potatoes along the inside edge of the dish or skillet on top of the green beans.
5. Place the chicken in the same bowl with the olive-oil mixture and coat thoroughly. Place the chicken, skin-side up, in the dish or skillet. Pour any of the remaining olive-oil mixture over the chicken. Sprinkle with additional salt and pepper.
6. Roast for 1 hour or until chicken is cooked thoroughly. Remove the chicken from the dish or skillet. Place the beans and potatoes back in oven for 10 minutes more or until the potatoes are tender. Place a chicken breast on each of 4 serving plates; divide the green beans and potatoes equally. Serve warm.

I am a horrible food photographer and my photo did not come out well at all so here is a photo from the Real Simple website. Surprisingly enough, my dish did look a lot like this!

Wednesday, September 25, 2013

Homemade Carrot Cake : My Go-To Birthday Cake for 50% of my kids

My journey in to watching what my kids ate, reading labels, and “going crazy over food” as my teenager likes to put it began two years ago after my oldest son was diagnosed with Asperger’s.  I will admit that when I first started dabbling in “clean eating” I truly thought all that entailed was avoiding artificial dyes, flavors, and preservatives and making everything from scratch.  Over the last two years I have come to learn that “clean eating” means so much more than that – avoiding not only artificial dyes, flavors, and preservatives, but also unnecessary filler additives like carrageenan.  I think one of the best clean eating rules I have read went like this:


When reading the ingredient label, if you don’t know what an ingredient is, or if you have never heard of it, there is a good chance that it is a chemical or processed ingredient.

I’ll admit that it is really hard sometimes. I tossed out things like Hamburger Helper a long time ago and there are crazy hectic nights when I wish I had some of those time saving dinners until I realize all the crap they are filled with.

Back to the originally purpose of this post: CARROT CAKE! When it came time for birthdays, I wanted to make a carrot cake from scratch. I sat down and thought back to all the carrot cakes I had ever had and what I loved about each one. Then I went to the computer and tried to find a recipe that incorporated all of those things: a moist cake filled with carrots, pineapple, and raisins, with lots of spices, and a cream cheese frosting. Yes. I love me some cream cheese! Well I couldn’t find one recipe that incorporated it all. So then I started just combining elements from various recipes and came up with this one.

Is it clean? Cleaner than a box of Betty Crocker! Is it paleo? Heavens to Betsy not even close.  As of now I try and use as many organic ingredients as possible.  This cake is not sugar free, it’s not grain free, it’s not dairy free… But it is like heaven in your mouth!

Homemade Carrot Cake : My Go-To Birthday Cake
Yields: 9-inch two-layer round cake
Ingredients
2 cups all purpose flour
2 tsp baking soda
1 tsp baking powder
1 tsp salt
2 tsp ground cinnamon
1 tsp nutmeg
1/8 tsp allspice
1/4 tsp ground ginger
Sift and mix all dry ingredients in a large mixing bowl. In a separate bowl, combine the following:
1 3/4 cup sugar
1/2 cup coconut oil
1/2 cup applesauce
3 eggs, room temperature
1 tsp vanilla extract
Form a well in the dry ingredients and stir in the wet ingredients. Then add,
2 cups shredded carrot
1/2 cup golden raisins (soaked in pineapple juice)
8 oz crushed pineapple.
Divide the mixture between two 9 inch cake pans. Bake at 350 degrees for 35 minutes or until a toothpick inserted in the center of each cake comes out clean. Let cool and frost.

FROSTING
3 packages cream cheese, softened
1 stick + 3 TBS unsalted butter, softened
2 tsp vanilla extract
1 tsp orange extract
1 3/4 cup powdered sugar

Beat the cream cheese and butter until smooth. Add in the extracts. Slowly add in the powdered sugar.

Monday, September 23, 2013

Slow Cooker Shredded Honey BBQ Chicken

One of my favorite things to do is figure out what to make for dinner when I have no idea what I want to make.  I pick a few random ingredients and/or requirements (“quick”), toss them in a search engine, and hit ENTER.

The other day I think I searched for +quick +chicken and crockpot.  Pretty generic this time I’ll admit.  It did give me a recipe that sounded promising and I ended up altering just a bit.  Overall it was a hit and what that means is that 75% of the kids ate it and liked it.

Slow Cooker Shredded Honey BBQ Chicken

1.5lbs boneless, skinless chicken breasts
3/4 cup honey
1/4 cup soy sauce
1 clove garlic, chopped
2 1/2 TBSP tomato paste
1/4 cup water
1 1/4 tsp black pepper
1 TBSP oil
2 tsp sugar
1/2 tsp brown sugar
1/2 TBSP ground ginger


Directions
1. Place chicken in the slow cooker
2. Combine remaining ingredients in a small bowl, whisk until blended, and pour over chicken.
3. Cook 6 hours on low.
4. Shred chicken with two forks, mix thoroughly with the sauce, and cook 20 minutes more.
I would have taken a photo but I was too hungry to get my camera. I had just spent over an hour in a car with a dead battery.
Powered by Blogger.

Legal Jibberjabber

All content on this site is copyrighted by the author. The views, opinions, and ideas expressed on this site are solely those of the author unless otherwise stated. No part of this site may be reproduced in any form without the consent of the author. All rights reserved.

Disclosure

The information on this site is not intended or implied to be a substitute for professional medical advice, diagnosis or treatment. All content, including text, graphics, images and information, contained on or available through this web site is for general information purposes only. You are encouraged to confirm any information obtained from or through this web site with other sources, and review all information regarding any medical condition, exercise program or treatment with your physician. NEVER DISREGARD PROFESSIONAL MEDICAL ADVICE OR DELAY SEEKING MEDICAL TREATMENT BECAUSE OF SOMETHING YOU HAVE READ ON OR ACCESSED THROUGH THIS WEB SITE.